Thursday, August 27, 2015

Making Kilts

I have been learning to make kilts.  Mostly hand sewn traditional kilts.  It is a long process doing this all by hand.  Somewhere around 40 to 50 hours of work for one kilt for the inexperienced kilt maker.  An experienced kilt maker could do it in 30 hours.

I have found the hardest part is sewing the pleats.  You have two difficulties to overcome.  The hardest for me has been keeping the width of the pleat constant and true to the desired measurement.  The pleats taper from the hip to the waist.  If  you are off just a little on each pleat you could be off inches in the final measurement.  The second is keeping the horizontal stripes aligned so you have a straight line after sewing each pleat.   Otherwise you have a horizontal stripe that looks like a stair step.

Below you will find pictures of the various steps involved.

Start with a lot of material.  Depending on the sett size, person's measurements, and pleat style  you could have 4 to 8 yards of material wound up in one kilt.


This one is 16 oz wool that is made for a kilt.  Material comes in double width so if  you need 8 yards in a kilt you can buy 4 yards, cut it half and join the two sides for 8 yards.  This works if the tartan is symmetrical.  This tartan is Wallace Hunting.  This is the tartan you see on the Scotch Tape packages.  For this kilt I only needed 4 yards as it was a box pleat design which takes less material. In the picture above I had 3 yards so I had to join both sides to get my 4 yards.  I should have ordered 4 yards then I could have made two kilts. 


Before you even go to this point you would have determined how you wanted to pleat this kilt.  Type of pleat:  knife, kingussie, reverse kingussie, box, double box, or military box.  There may be more options but those are the ones I am familiar with.  Are the pleats to be pleated to a stripe (one of the vertical color lines), if so which one, to the sett (so it looks just like the material laid out not pleated).  Once you have that and the measurements you can layout the kilt.  In the picture above I have marked the front apron.  In the next picture I have marked one of the pleats. This is a box pleat so they are wider than if I was doing a knife pleat.  I have a hard time keeping the width correct so I have started to mark the edge of the pleat with a chalk line and pin it multiple places.  The pleats are sewn down from the "fell" line to the top of the kilt. Note the taper to the waist. The waist line is 2" down from the top of the kilt.  The taper stops at this point and the pleat width is then straight to the top of the kilt.


Now it is time to sew the pleats.  This take the most time.  Starting out it took me an hour for each pleat.  If you have 25 pleats and it takes an hour that is 25 hours just for pleats.  Even longer if you sew one (or more) in and they are wrong. Then you have to remove the stitches and do the bad ones over.  You are sewing from the top of the kilt to the "fell" line (middle of the butt).  For me that is 7-1/2".


Pleats are all sewn down at the top. Now it is time to get the bottom part of the pleats in place.  They are not sew.  Wool can be shaped with steam and pressure.  So we will press the pleats in place. That will leave a nice crease along the edge of each pleat.  To make sure they are in the correct position the pleats are "basted" down.  I put in 3 or 4 rows of basting.  Here there is one row at the bottom and I have started on the one just below the fell line. You can see the white thread. At least two more rows will be added.


Next I will work on the internal construction of the kilt. Wool will stretch so I can not just have the wool holding the buckles.  The kilt would quickly be stretched out of shape at the top.  So a stabilizer is added between the two points where the buckles are attached.   This is just a length of cotton that won't stretch.  I decided to put a little surprise in the kilt should anyone ever take it apart.  Used this Star Trek material.  You won't see this once the kilt is complete.  It will be covered by the interfacing and lining.


I must not have taken any pictures of the remaining internal construction of that box pleat kilt.  So I am showing a different knife pleat kilt. This one was pleated to the sett.  In a knife pleat kilt the inside of the pleats above the fell line are cut out.  It is just unnecessary bulk that can be removed. Not an issue in a box pleat as there is not that much material.  The cut out pleats are covered with a stabilizer.  Historically, this would have been horse hair canvas.  This is a synthetic canvas used here.  This stiffens the top of the pleat.  The interfacing is installed in all traditional kilts regardless of the pleat style.


Here is a picture of me cutting out the pleats.  Up until this point I could have removed all of the stitching of the kilt and started over making changes to all that I have done.  Once I cut the material out I am committed to my design.  This is the area of the pleats that are sewn down.  So the inside of the pleat is just a closed loop that has no purpose.  So we cut this excess material out. This area will be covered by the interfacing.


Other work that has to be done is adding the waist band and finishing the apron and under apron edges.  I add a fringe edge to the apron. The edge of the apron is curved and when folding back the edge we try to keep the stripes aligned.  This causes the material to pucker.  Being wool this will shrink and flatten out when pressed.  The stitching helps hold it flat during this process. All the white basting will be removed when we are done.   In the next picture the waist band has been added.  The stripes in the waist band must align with the strips on the front apron.  Unfortunately they will not align for the remainder of the kilt.  They will be off even when the kilt is pleated to the sett.


The last step is to add the lining. This covers the interfacing.  At some point the buckles and straps are added. I use an inside strap and buckle on the underapron.  Most kilts are made with all buckles on the outside of the kilt . This requires a button hole for the under apron strap.  I also only use two buckles. Many kilts are made with a third buckle that is really not required.  Maybe it is for a dancer's kilt but for the rest of us it is not.  I don't think the third buckle was on traditional kilts.  That was more of a modern addition.  


Completed box pleat kilt


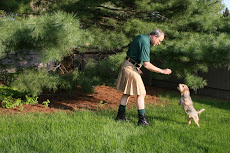
Completed IPA (International Police Association) tartan kilt.  The QA inspector is looking it over.  I guess it passed as she is taking a nap after all the hard inspection work.

Friday, January 30, 2015

Utilikilts and Ebay

I now have a rather large collection of kilts. I have not counted them for a while but I would guess over 25. I should write up something on my collection at this point. Post for another day.

In this post I will talk about the Utilikilts I have. My first Utilikilt was purchased in the summer of 2008. What I liked about that kilt was the soft feeling of the cloth and it was machine washable. Being a utility type kilt the pockets on the side were very handy. There were a couple of things I did not like about it. Minor really but they bugged me none the less. One was the pleats would curl up. The second was the hem was not parallel to the ground. As for the pleat curl I have been told that happens for a number of reasons. I don't know if this is the real reason or just someone's guess. It could be just a behavior of cotton or because of the type of thread used to sew down the edge of the pleats. Who knows but I guess I can get over it. As for that tilted hemline. The utilikilt were designed to be worn at pant's waist rather than the higher natural waist of a traditional tartan kilt. Look at just about any guy in jeans and notice the belt line. It will be tilted down toward the front. More noticeable if the guy has belly. The Utilikilt (at least the earlier versions I have) the distance from the top to bottom of the kilt is the same all the way around. They had a "beer belly" option that would account for the tilt.  I have never run into one with that option. So when you wear the kilt the waist will be tilted down in the front so the hem will also be tilted. Lower in the front.

My kilt was particularly bad about this tilt. I did not realize it for almost a year. I examined it more closely and found the length in the front was longer then in the back. That made it worst. It would have been better if that was the other way around. So one day I decided to modify the hem to try to remove that tilt. You can see the modified length in one of the pictures below vs the other kilts that don't have any adjustment. To do this I left the back alone and raised the hem starting at the side to up about an inch and a half in the front. So now the kilt hem is parallel to the ground. Unfortunately there was a minor problem. When I ordered the kilt I had a custom length which I purposely made a little on the short side. So my kilt was set to about an inch above the knee cap. Guys have legs too get over it. So now I needed to bring up the front. The length was already backwards as I said above. So now I had to raise the front. The end result was the kilt is shorter than before and it was short enough to start with. So this kilt is now more for knocking around the house working on projects.

 I wanted to get another Utilikilt but those things cost some money. What kilt does not cost a lot. So I started to look around Ebay. Guys will get these kilts and then end up not wearing them so they turn up on Ebay. I set up a search on Ebay for Utilikilt and would get an email when one showed up on the site. Did not take long for my query to get a hit. I ended up getting three kilts over about a year and a half. The first two I obtained were standard style Utilikilts. They are way too long but that is good because I can now re-hem the thing and get rid of the tilt without the end product being too short. I have not done so yet. I noticed something else. The first one I got on Ebay did not have snaps under the belt line. The one I purchased in 2008 has snaps. Turns out this Ebay kilt was an earlier model. The design and manufacturing process has changed somewhat over the years.

 I am going to digress here a moment. Inside of the kilt there are a couple of labels. One has a date code among other information. I wish the people putting Utilikilts on Ebay would photograph that second label. Most just photograph the first with the size.


On this photograph notice the label showing the factory of manufacture and the material 65% poly and 35% cotton.  After that is 08/08 which is the date:  August 2008.  That is my first Utilikilt.


The last one I got on Ebay was a Mocker style. The Mocker kilt was intended to be the kilt equivalent of a pair of Docker pants. Nicer material then the standard Utilikilt. Also, the pockets were built into the kilt rather than hanging on the side. More pants like. So this was a much nicer kilt. I don't think this kilt was ever worn. I won't be able to change the hem on this one as the length is just where it needs to be. I don't want to end up making it any shorter. So I will put up with the tilt.


Here are the four I have now. My first is in the upper left. The Mocker is in the upper right. The two longer standard ones are on the bottom. No I don't have a dog sporran. That is my helper who just wanted to lay on the kilts during the photo session.

In this photograph you can see the missing snaps under the belt line of the 2005 model. My 2008 model has the snaps. I have no idea when they added the other snaps but that was a good idea. That kilt without the snaps has a date code of 2005. I will add a couple of snaps to this 2005 model when I modify the hem. That second kilt is also long so I have plenty of material to work the hem.


Here is my modified hem. You can see it is shorter in the front to make up for it lower at the waist. From the side the hem is now parallel with ground all the way around.

On the other kilts the the distance from top to bottom is the same front to back

On the Mocker the pockets are built into the pleat rather than hanging on the outside. I have circled the pockets which you might be able to make out in the photo. On the back there are two hip pockets rather than just one on the standard.

That is my review of my Ebay Utilikilt purchases. If you want a Utilikilt try searching Ebay. You might find one that will save you a few bucks.

Kilt on my friends!

Monday, January 26, 2015

Another Kilt Blog

Ran across a new kilt blog. This is a nice one as the writer provides a lot of updates. Unlike mine where I might do a few a year. Looks like Matt started this one in January of this year. Check it out: Year of the Kilt